
DIY Ping-Pong Table w/ Wood & 3D-Printing
I made my own ping-pong table + came up novel 3D-printed table building technique & addressed a geometric challenge in the process. [NUC #19]

When I went to buy parts for this DIY ping-pong table, my son asked if it would be cheaper to just buy one.
The short answer is likely NO if you’re not counting your time, and DEFINITELY NO if you pay yourself Florida’s $14/hr minimum wage. Per a quick search on Amazon, Ping-Pong tables are around $400, or a bit more at sporting goods chain Dick’s. If you can find a used table — or even a broken one to repair — all bets are off. Just buy it and have fun playing.
BUT, buying means you won’t have the fun of seeing the table come to life in your garage! There is, however, an elephant 🐘 in the room that we need to address. Likely the reason we don’t see similar builds more often:
If you’re into offbeat engineering, real-world builds, and practical tech thinking, subscribe 👇
The geometric (9x5) challenge
The official top dimensions of a Ping-Pong table are 9 x 5 ft. Plywood is generally sold in sheets of 8 x 4 ft, and good luck getting anything bigger than that home in the car. This is a problem.
The solution: Get the two sheets cut as show below-left at your local wood repository; then arrange the pieces as shown below-right.
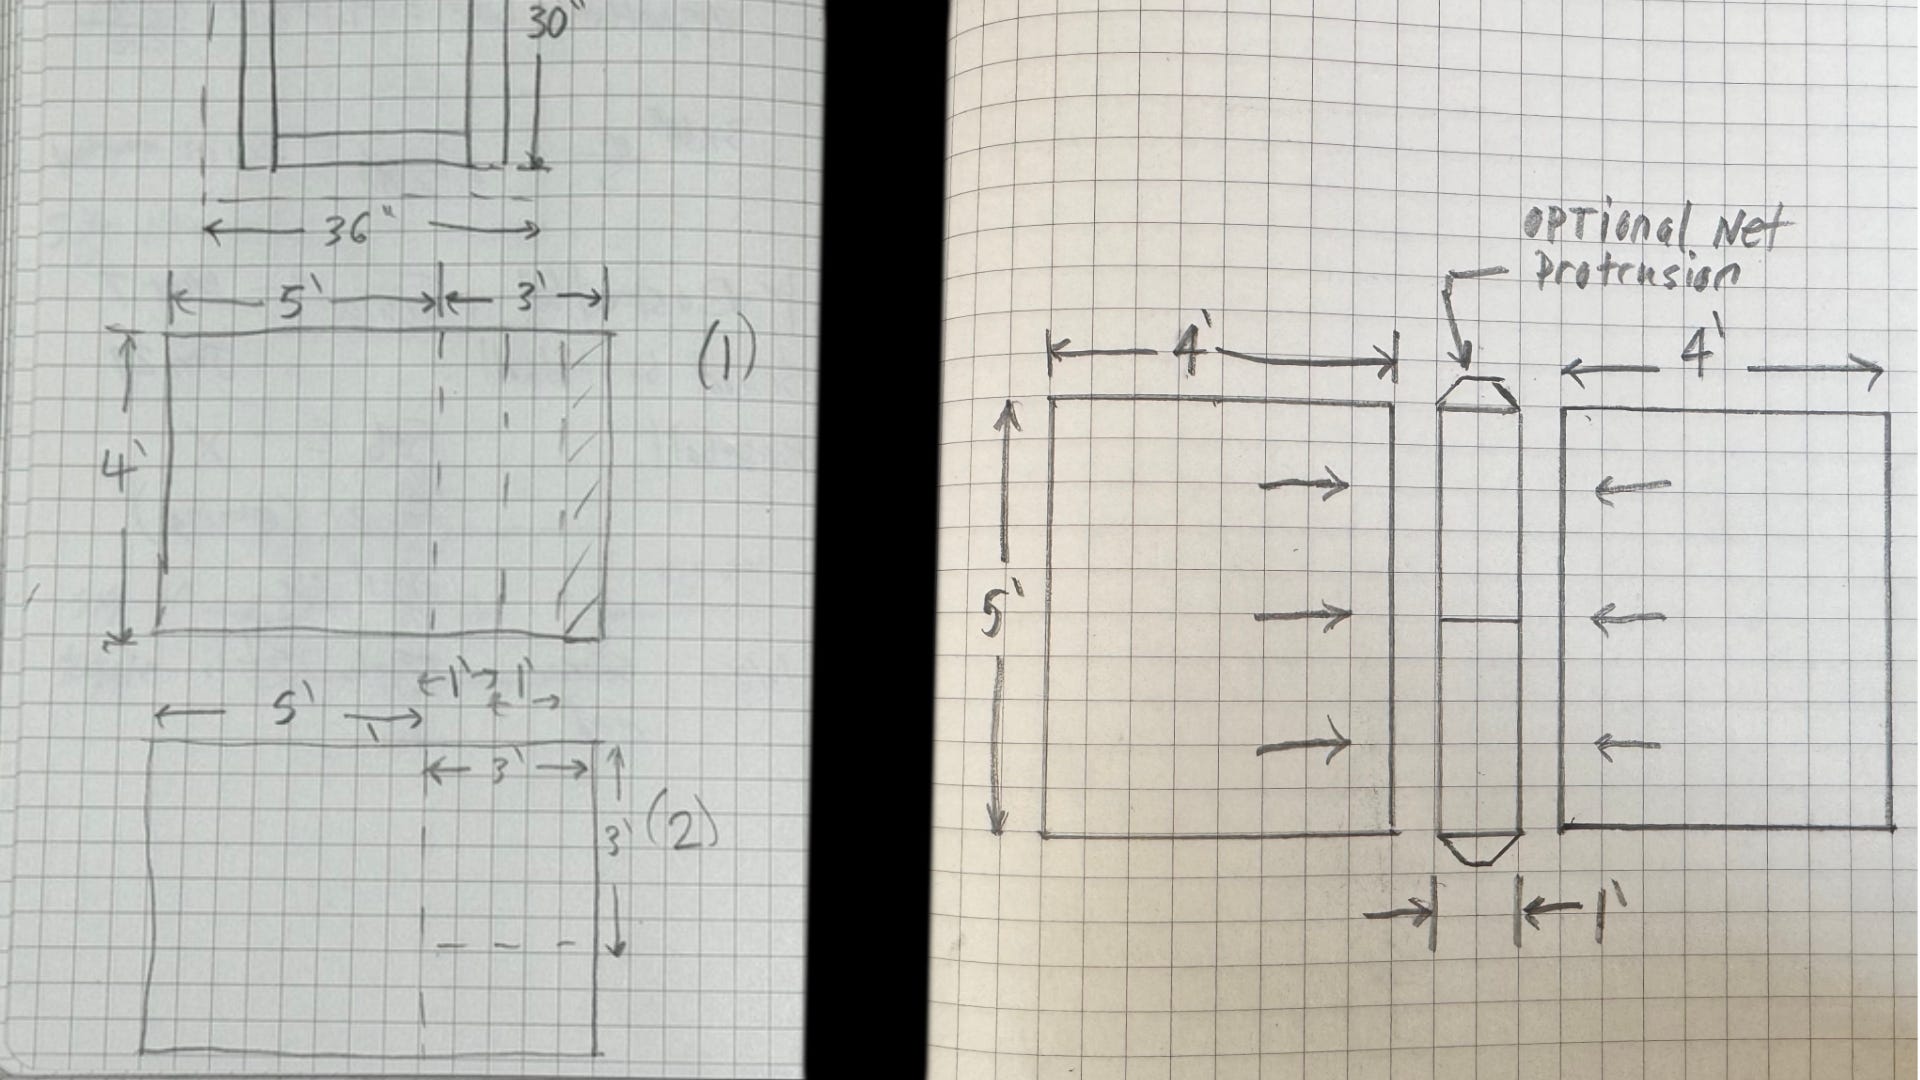
This sort of assembly does leave you with two seams, six inches from either side of the net. However, the frequency of the ball hitting there is fairly low, and you can smooth things out with paint, filler, and glue. However, you can’t fold the table up for storage or practice. Still, I’d list these as acceptable tradeoffs.
2x4 and 3D-printed frame
The frame that supports the plywood is made out of 2x4s, arranged so that the two longer top members are 8’ lengths — no cuts, since they come that way from the store. The cross members are 4’, or half that — so one cut. Angled wood supports were added later, and adding these helped immensely with stability. The lower horizontal supports are… purely theoretical a this point.
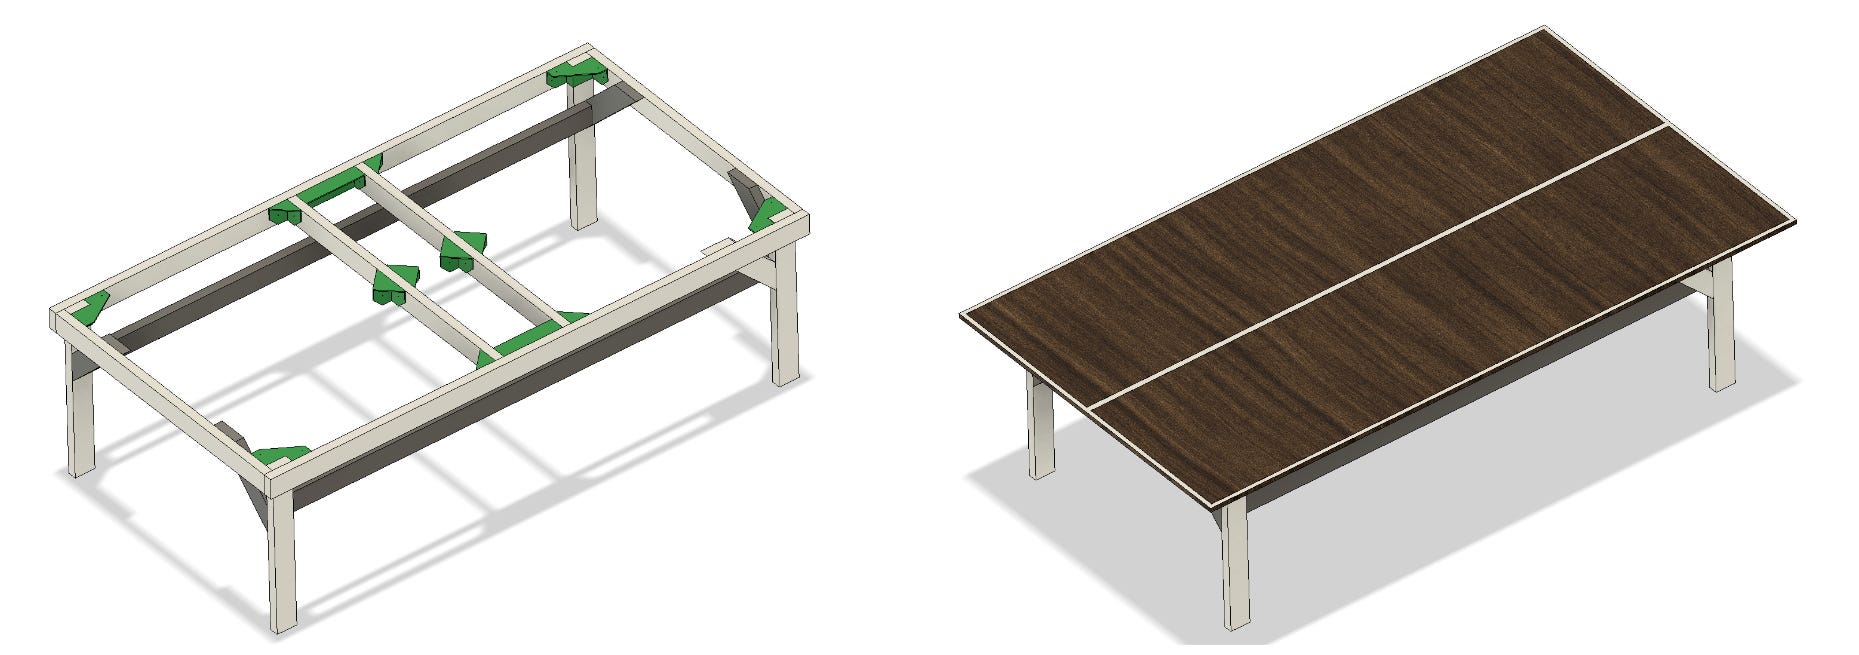
The green pieces are 3D-printed helpers that…. help with frame assembly, and are designed in such a way that you can stable through them into the top plywood. This allowed me to assemble everything upside down without disturbing the play surface. Once flipped into place, I painted the surface green with a roller, and added lines around the edges and center. This really sets things off nicely.
While the build was nominally successful — and looks great — there were a few things that I would do differently if were to build one again.
The good… and the bad
First, what makes this awesome:
Paint/playfield color looks great, and the spray-paint lines add a nice effect
Net support tabs lead to some scoring ambiguity, but keep the posts out of the way - net positive IMO.
Angular wooden supports make it much stronger.
Building the frame/surface upside-down on the ground (shown in video) with weight on top facilitated a square assembly.
What I might do differently:
I used OSB, instead of traditional plywood, which was the wrong choice. While I did save some money using it, plywood would have provided a more even surface that would stay together better.
Consider using fewer 3D-printed supports, assembling only the supporting frame upside down to make that square. I could then flip it and apply the surface plywood right-side-up with glue (and weights on top).
If I DID staple/flip again, I would get more help.
The cover keeps off rain, but if water stays there for a while, it ends up soaking through. Need a better solution for this.
Supports for any table
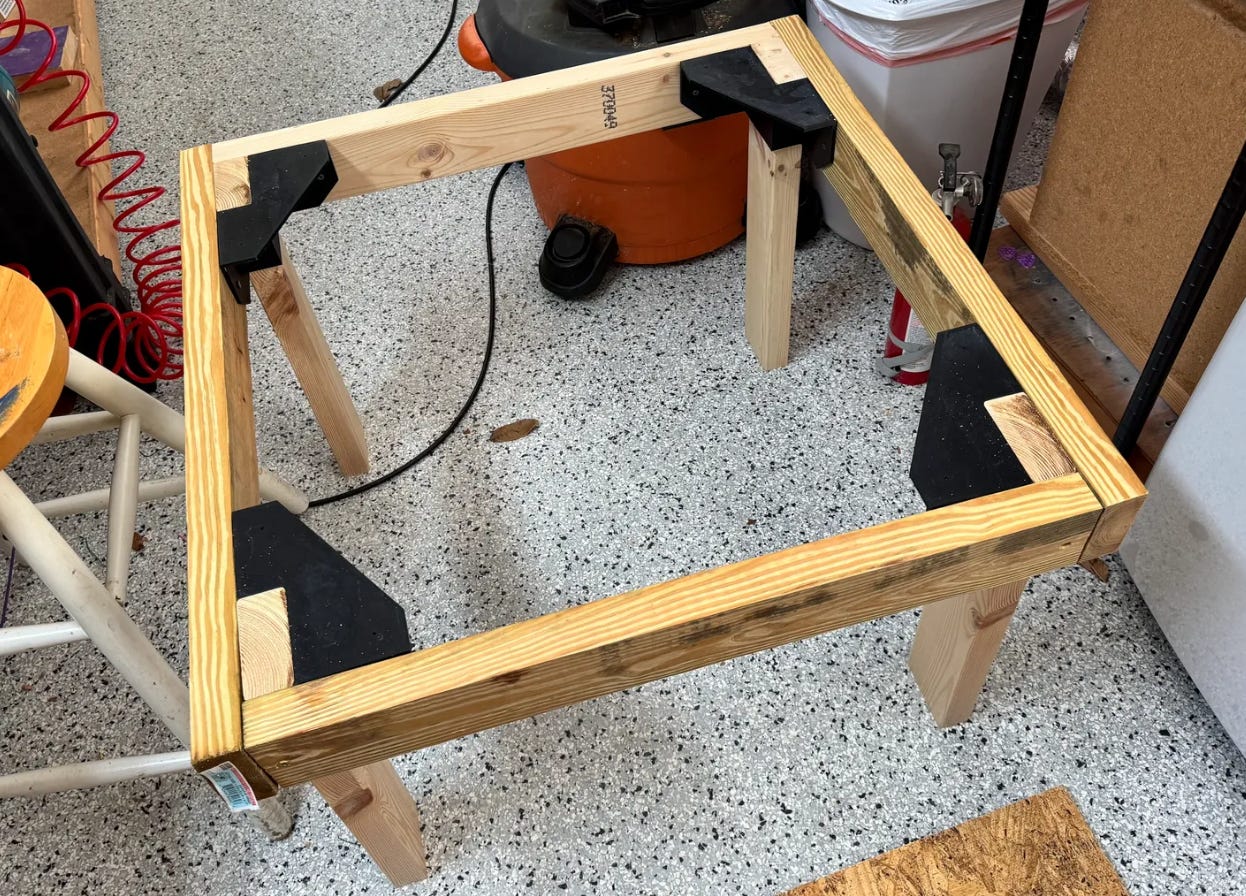
During this process, I used a leftover 3 x 3’ section of OSB for a nice mini table/prototype. This allowed me to test the screw-in-place corner supports on a smaller scale.
While not everyone needs a ping pong table,1 many people would like a way to make a simple coffee table, card table, or even dinner table with inexpensive wood. This was inspired by the 2x4 Basics legs that I’ve used in the past, which are apparently no longer available on Amazon. It appears they are, however, available on 2x4basics.com.
Was this worth it?
On a purely money/time basis, the answer was certainly no. I maybe saved $100, and put in at least 20 hours of work. However, it’s fun to use, and I take some satisfaction in the fact that I made it when I see it on my porch with its custom base coloring and spray-painted lines.
If I were to reframe it as… a functional piece of art, the answer becomes “yes, definitely worth it.” Also, I get to write about it here.
Of course, one has to also consider the next best alternative. If I didn’t make this, would I otherwise spend my time watching TV? If so, that’s a vote for DIY. If you have an opportunity to do something more productive and/or enjoyable, then just buy a table. Being self-employed, my opportunities for monetary profit vary greatly on a day-to-day basis. It’s nice to have something that I can work on as I have time.
Video & Build Specifics
If you’re considering building your own and/or want to see the results, check out the video. A bill of materials is below that, and the cutting diagram for Lowe’s/Home Depot/etc was shown earlier in the article.
Bill of materials:
(2) 4x8 sheets of OSB cut to diagram (recommend better wood if possible)
(7) 8’ 2x4s
1-1/4 inch wood screws
2-1/2 inch wood screws
2x6s (optional - handle/storage)
Paint
3D-printed table assembly helpers
3D-printed net spacers
Net/Paddle kit [Amazon]
Ping Pong table cover [Amazon]
Enjoy! -JC
Techadjacent is where I share engineering ideas, builds, and practical tech analysis. Subscribe to get the next post in your inbox — published weekly👇
Thanks for reading! I hope you follow along on this Techadjacent journey. Fair warning: I can and do get a little off-topic in the footnotes.
Note: Some links may be affiliate
Addendum/Footnotes:
One might argue that on one actually needs a ping-pong table.
Notes are kind of thin this week. LMK in the comments if you want more footnotes.
This is so deeply nerdy and I just very much approve. Great job!