
3D-Printed Sunshade Mount Fights Summer Heat [QUC #8]
No, I didn't print the sunshade, but I did print the majority of the hardware used to hold it up. [Questionable Use Case #8]

As I write this on May 29th, 2025–at an undisclosed1 location roughly halfway down the Gulf Coast of Florida–it is getting hot. According to my phone, it is 89 degrees out, which seems optimistically low. Given the tyrannical nature of the sun here, our screen-topped porch is underutilized as none of my family likes getting too hot and/or sunburned.

This summer, however, we have a new solution: A sail-like triangular sunshade, mounted with 3D-printed hardware!2
The 3D-printed doodads
So as not to bury the lede, let’s talk 3D-printed parts: While the 12x12x12’ triangular “sail” shade came from Amazon, as did the paracord used for attachment3, the tensioners👇 as well as the (less photogenic?) anchors👇👇 were both modeled by me and 3D-printed.

I got the idea for the tensioner–and the basic dimensions–from another model that I printed out and was originally going to use. However, I wanted to make a few changes so modeled a new one.
That print was copied from another similar tensioner made out of aluminum, which in turn seems to have been a knockoff of a “Loop Alien” device that may or may not have been the original… and was certainly based on other tensioner concepts. Weird how things evolve over time.
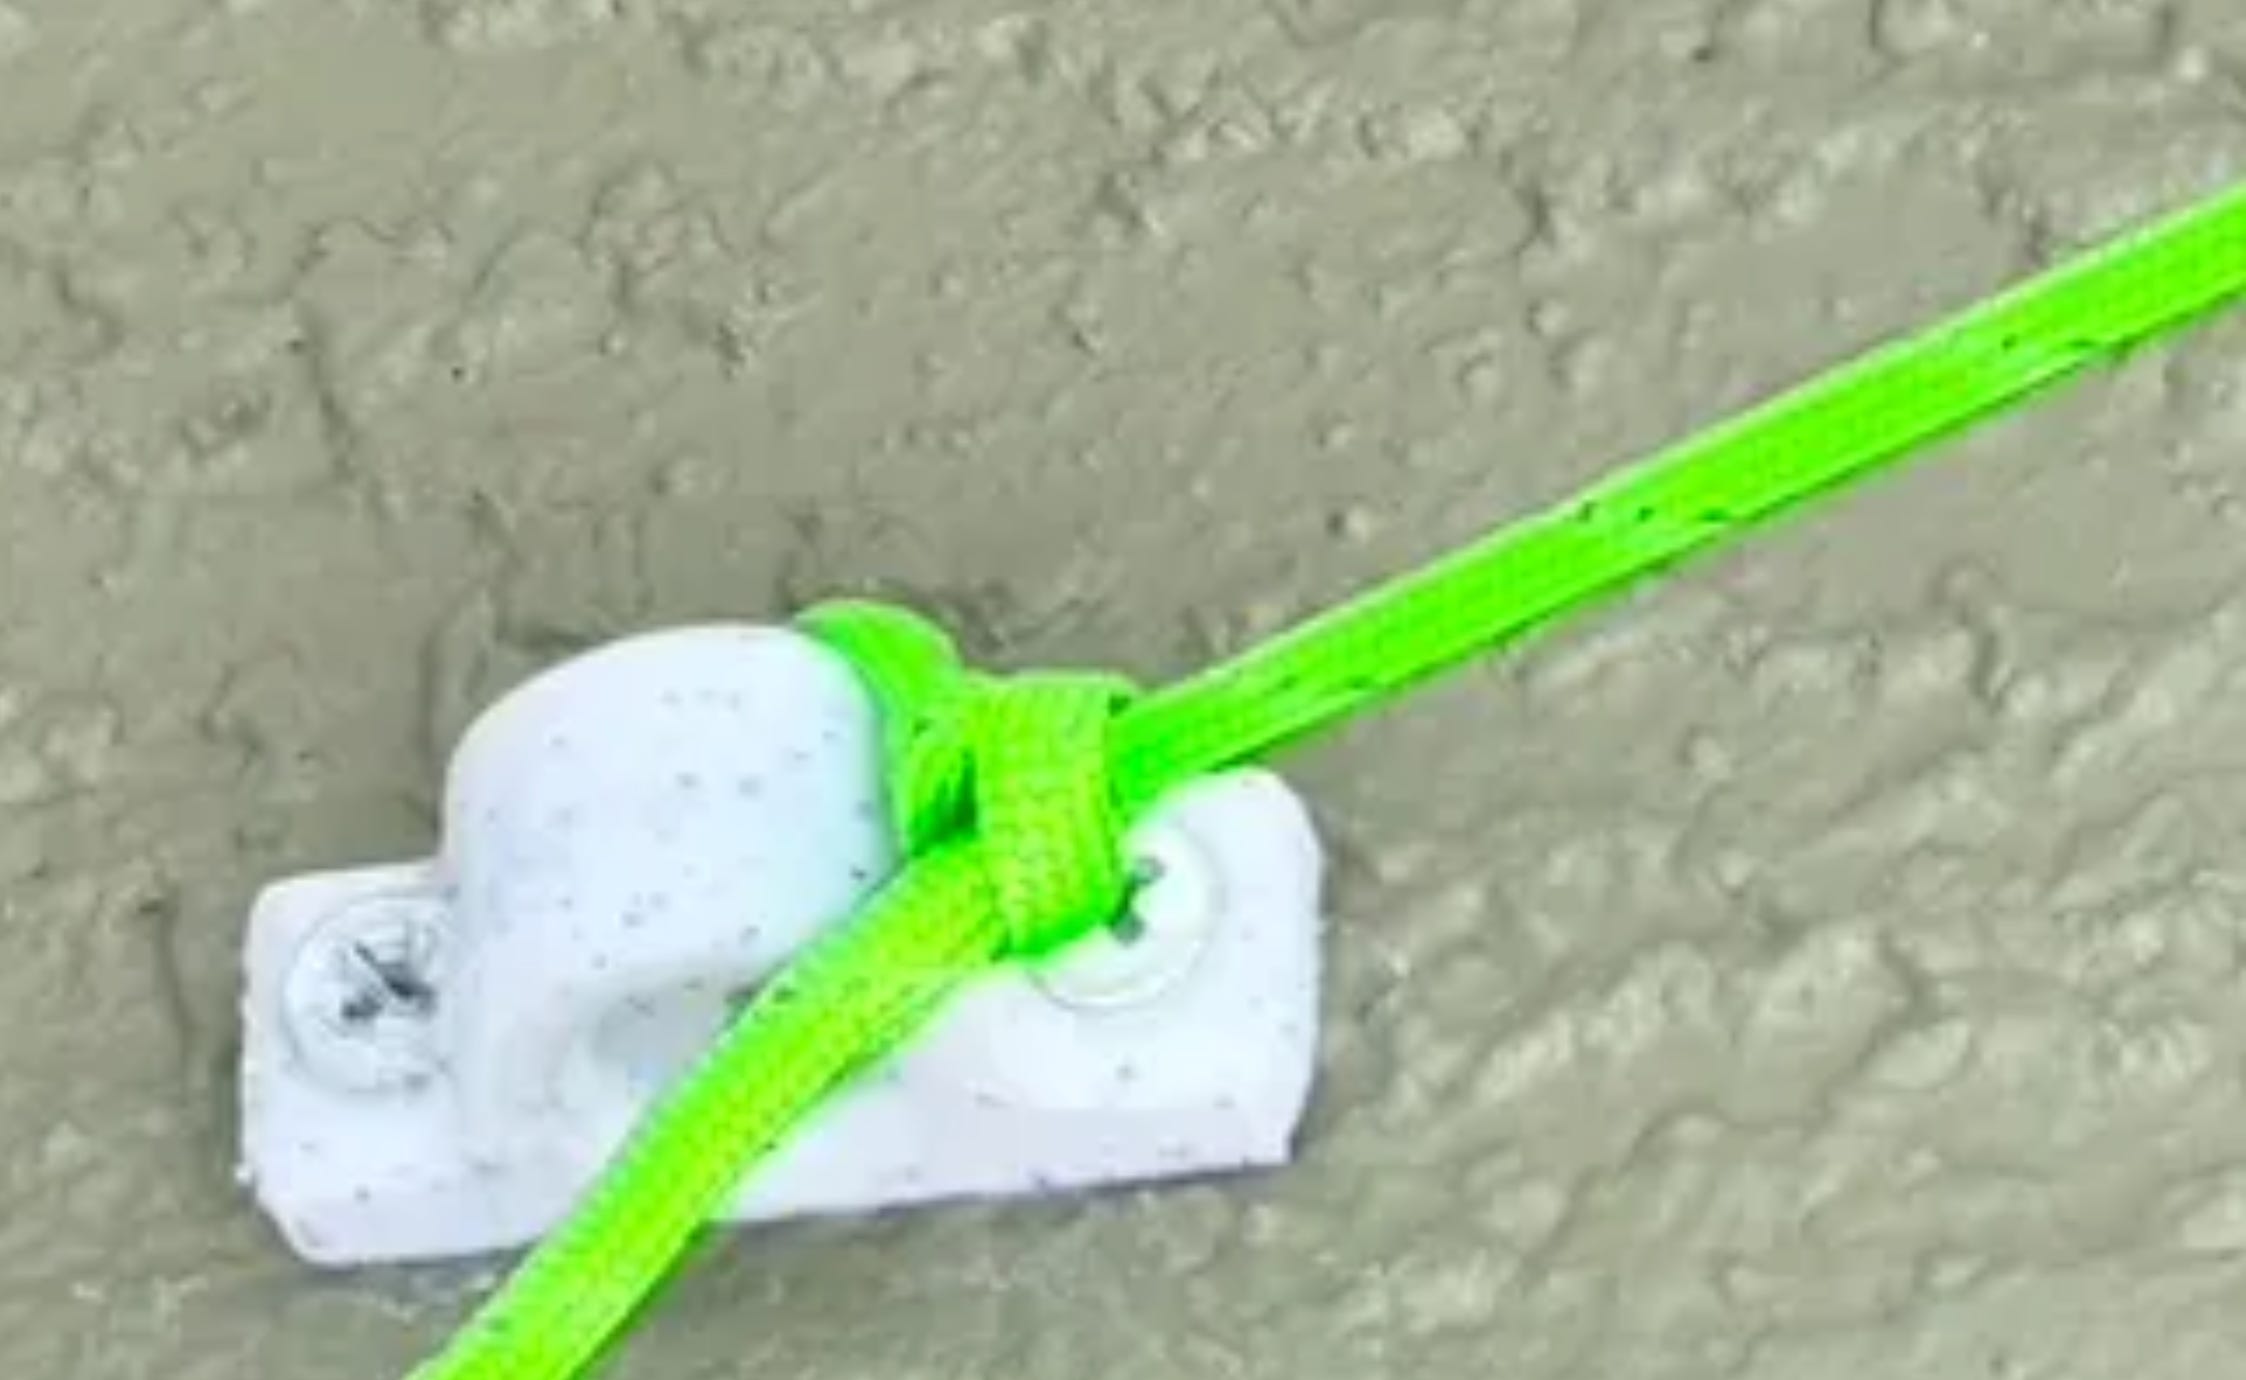
The anchor came out of my head entirely, but this obviously isn’t a new concept either. Both of my(?) designs are available in the link above in a glorious public domain licensing format, complete with the CAD models. I would especially recommend the tensioner, as it’s fun to play with and spin around on your finger.
With that out of the way, read on for the rest of my sunshade mounting adventure:
Masonry mounting (is a pain)
I won’t go into this too much, but I mounted the anchors using screws, two out of three of them into masonry. Drilling holes for the screws was difficult with a proper-sh tools–don’t even attempt this operation without a masonry bit. It seems you have to push the bit in and pull out slightly as you cut (over and over) to allow the ground up masonry to escape. It’s a slow process.
Geometry considerations (equilateral sails ≠ 90º)
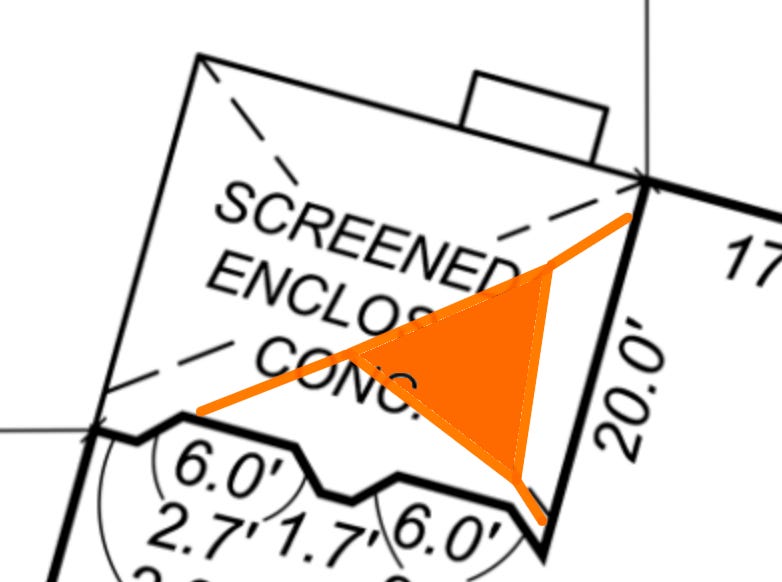
I attached this sunshade between perpendicular (90º) walls on my house, facing the porch. The shade itself–as an equilateral 12x12x12’ triangle–featuring only 60º internal angles. This means that attaching the sail in ~the corner of the walls requires a much longer anchor distance than the 12’ that you might initially surmise.
At the same time, this dimension doesn’t have to be exact, and positioning can be adjusted with the 3D-printed doodads mentioned above. I sketched things out and scaled everything with the help of my super-useful PCB business cards4, a compass, and a bit of math, and came to the conclusion thatI basically needed to place my anchors out as far as possible, equidistant to the corner…

Observant readers will note that my drawing says 16’, not 12’. My math vs reality was therefore off a bit…
The lesson? First off, check your dimensions before doing any calculations! More specifically here, if you install your own shade-triangle for a 90º space, choose your base, and set the other anchors equidistant to the corner and significantly longer than the sail’s edges. This should actually be further out than my drawing would imply, as the corner anchor will pull the two other lines toward it.
Possible drawbacks (i.e. will it melt? 🌞)
The big elephant in the room here is that I used PLA to print both the tensioners and anchors. I really don’t know how they’ll react to sunlight over the long/medium term. Marking the date, I installed this sunshade on May 29th, 2025, including (6) 3D-printed devices (3 tensioners, 3 anchors). Perhaps I’ll revisit this in the future to report on the results/longevity.

On the other hand, this sunshade will only last so long itself, so one might call this a degradation race between purchased and printed parts. I did use light-colored “stone” filament that I hope will keep it relatively cool compared darker shades. I suspect these will will still get quite hot though.
A good project?
One could also argue that I should have just purchased the mounting hardware for my sunshade, given the time I put in designing, printing, and refining them… but what fun would that be?
At the end of the day, I have a nice shady spot on my porch that should be a fun place for family, friends, and perhaps even our dog to hang out. It’s a good space upgrade for not a lot of money, and something I’d recommend–whether you go the 3D-printed route or not!
What do you think about this sort of DIY/home improvement post with a bit of my own tech/3D-printed spin on it? Please do let me know in the comments, or just reply back to this email if that’s easier for you (and that’s how you are reading this).
Thanks for reading! I hope you will follow along as I post weekly about engineering, technology, making, and projects. Fair warning: I am a native Florida man, and may get a little off-topic in the footnotes.
Note that any Amazon links are affiliate
Addendum/Footnotes:
I’m not disclosing it at least, but based on the pictures and video that I’ve shared over the years, along with any number of publicly available sources, it’s not that hard to figure out where I live.
I’m inclined to say central Florida, but to me that implies somewhere like Orlando or Frostproof. Gulf Cost of Florida makes me think of somewhere like Apalachicola in the northern panhandle. Small problem I guess. If you’re reading this from across the globe, this certainly makes little to no difference to you. Thanks/apologies for getting this far into the footnote.
Inspired by neighbor Jason D, who has a rectangular version over his grill. He also helped inspire my PCB business cards and has his own ad hoc pineapple garden if that is of interest.
The 12x12x12’ shade that I purchased was $15.99, but when I link it here, it seems to take you to one that costs ~twice that price. Shop around there and elsewhere, and I’m sure you can find a better deal. This bright green paracord is pretty neat, though whether or not you should trust it up to 750 pounds is something of an open question (i.e. don’t). You’ll also need filament, masonry screws, and a masonry bit, though masonry screws often come with an appropriate bit, so that may be covered.

And if you do have paracord and a 3D-printer, this winder thing is pretty neat. It’s not my design, but I did make the one shown👆
The Perfect PCB Business Card

Waaay back in February 2025, I outlined how you can make artistic designs on circuit boards, highlighting a few of my favorites. But where does the world of art end and the realm of practicality begin?