
Improve Your Video Quality With These Camera Mounting Tips!
Holding your camera may seem like a small thing, but solo-filming your projects, products, and life means careful camera positioning. What works for me after years of practice.

Those of you who have followed my work for some time know that I have a YouTube channel (actually two or three). This/these started out as a way to document things for my blog, and as that platform developed, so did my presentation.1 Among other things (e.g. better lighting and recording hardware), this meant that I had to figure out how to actually hold my camera when doing things.
If you don’t regularly document your projects, you might consider this to be an afterthought. However, the right-tool-for-the-job concept is broadly applicable in many other situations (which I elaborate on at the end of the article, so feel free to skip there).
As for camera mounting equipment, here are several solutions that have worked for me:
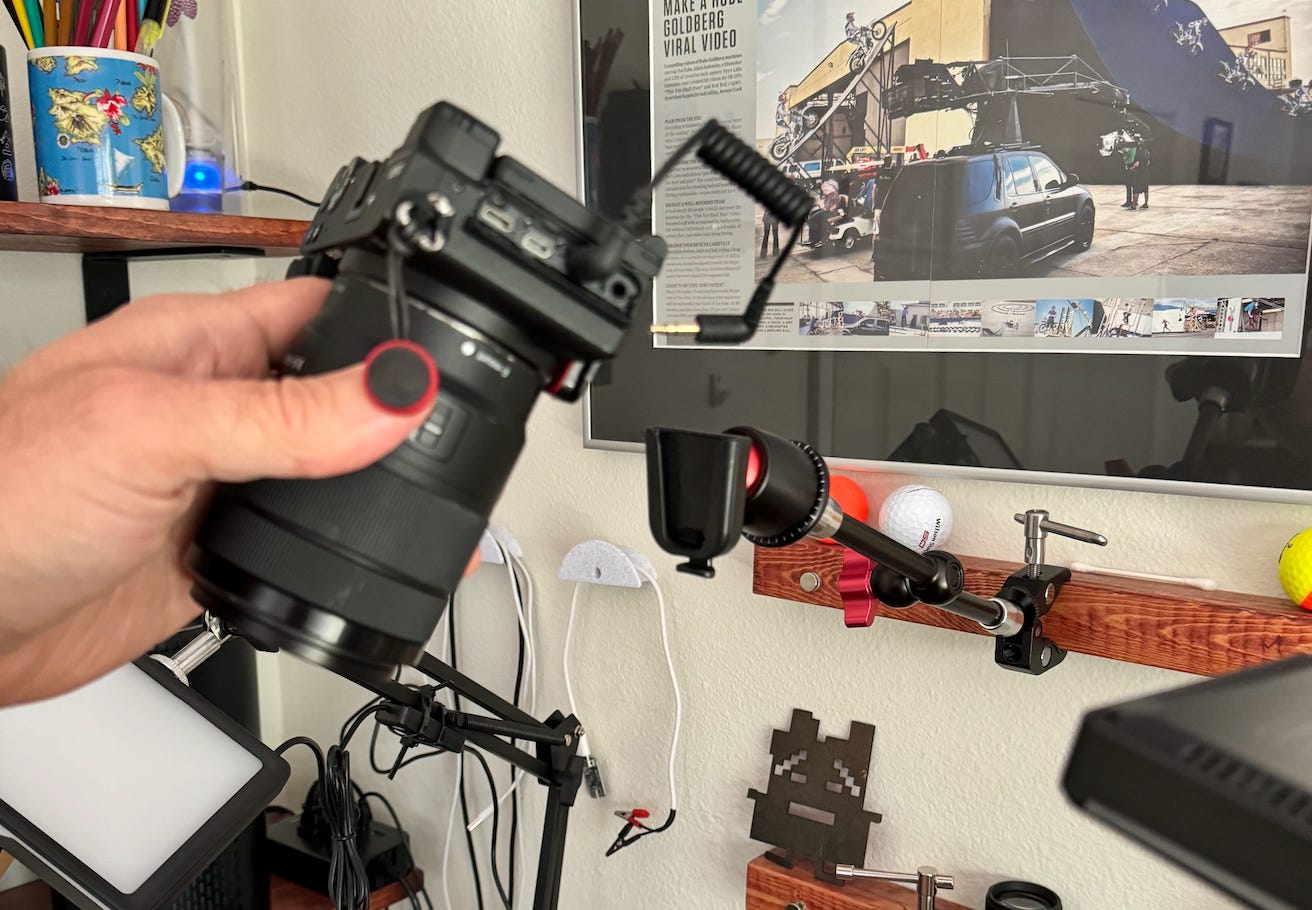
Friction arms
These magical devices allow you to position their (typically) two-member linkage systems in whatever angles are needed. They then lock them in place with the twist of a knob.
How this works internally is beyond me, but they do work, and often come with a clamping arm on one end that lets you attach it to a table, 2x4, or other solid surface. On the other end you can mount your device via the 1/4 - 20 thread that’s built into many/most dedicated cameras.
I also used a number of them them to help make this👇 robotic tongue drum fixture. So these things are quite useful in a number of quick-positioning scenarios:
But–back to video documentation–why waste time screwing your camera in each and every time you want to use it?
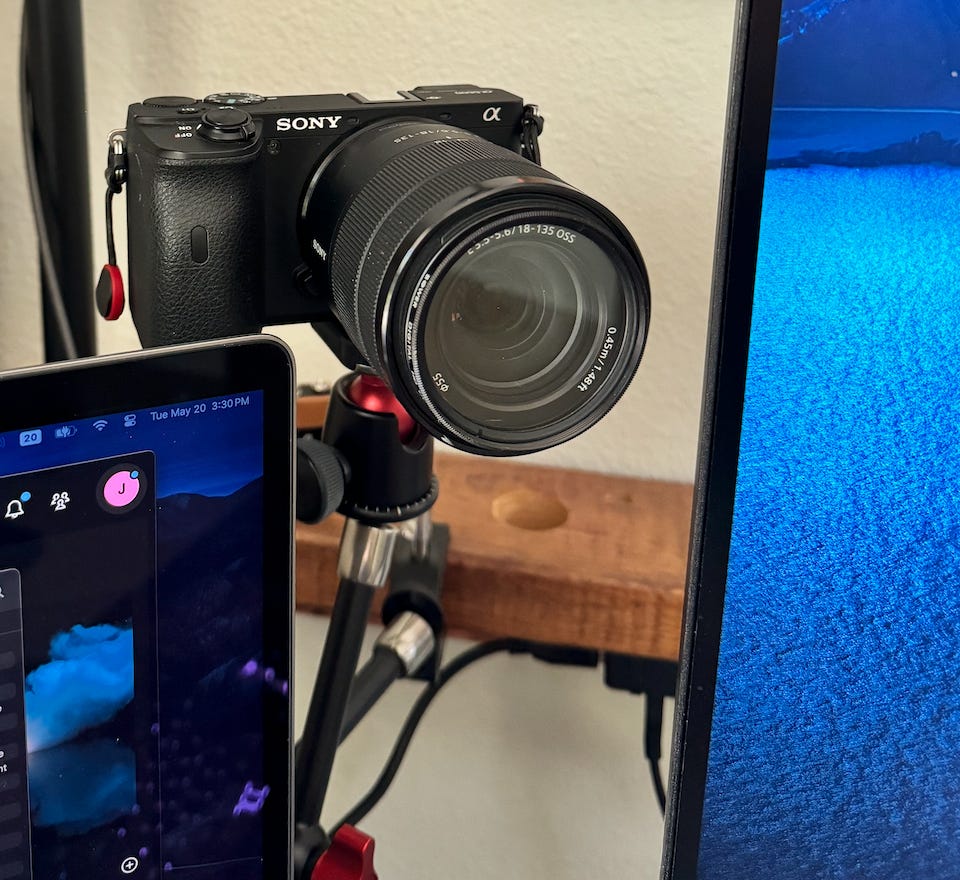
Joby BallHead 3K quick-disconnect/pivot
To save a bit of time switching between different camera mounts, I use a Joby Quick disconnect BallHead 3K fixture–actually several of them in different mounts that I leave set up around my work area. They add more axes of adjustment to your setup, but more just as importantly allow you to quickly get your camera set up.
Wooden 2x4 wall mounts
So you have a friction arm and pivot, but without anywhere to attach it, it’s kind of useless. To solve this problem, I mounted several lengths of of 2x2 and 2x4 lumber to my office walls. These provide a solid base on which to attach my camera mounts, and I would recommend doing this if you often film in roughly the same place(s) (e.g. if you like/have to do talking head videos with any regularity).
Movable magnetic stud [and weights]
For those times when you need to mount a camera on an arbitrary flat surface–especially one that is ferromagnetic–I came up with this magnetic “tripod” stud. This 3D-printed doodad features an array of neodymium magnets on the bottom, which attaches it to (many) metallic surfaces:
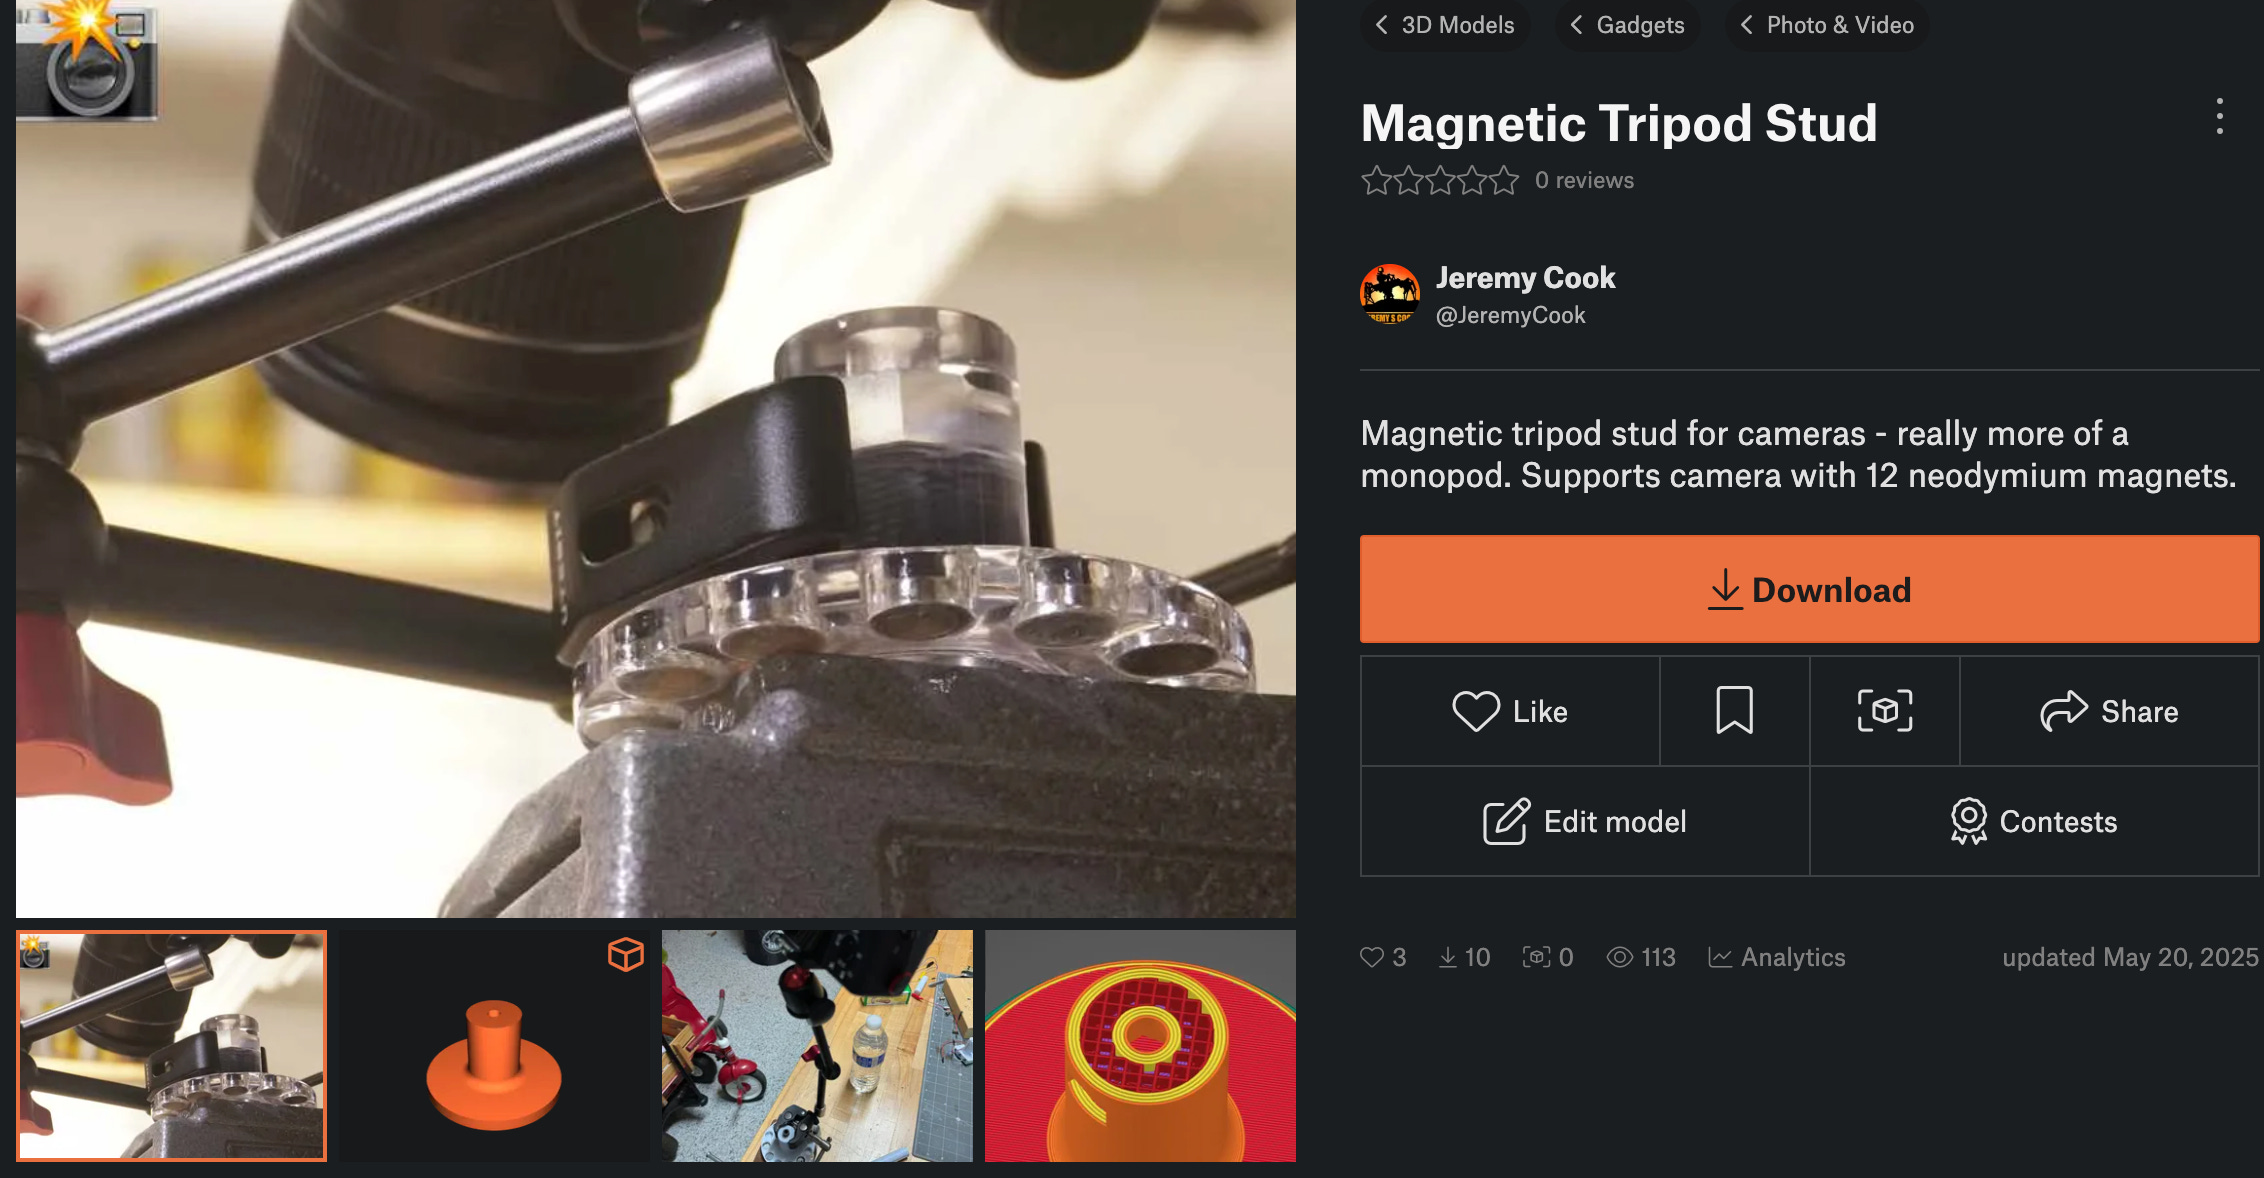
Note that this sort of attachment works much better if the magnet is sticking directly on the to-be-attached surface. This isn’t reflected in the beautiful clear print image above, but one of the linked files allows you to print with magnets fully down.
Mount and keep in place [technique]
At my typical “talking head” filming location (i.e. my desk) I have a mount set up that I rarely move, in a position that is ~level and doesn’t interfere (much) with my monitors. To set up to film, I slide my camera in the BallHead 3K, zoom out to the maximum, and (at least spatially) I’m ready to go.
This is only possible because I have multiple friction arms/ballheads strategically arranged around my workspaces. While rearranging things once isn’t a big deal, that 5 minutes of fiddling around to get the perfect shot adds up quickly. Invest in the camera mounts you need now, and save yourself a lot of hassle later.
EXTREME tripoding
The below fixture is not my rig, and it looks like it took a lot of effort to build. However, the resulting video of objects on its rotating platform is fantastic. More information and video is found here.

The appropriate tools for the job
While you may or may not do a lot of videography, I think the underlying lesson here is that if you’re going to do something over and over again, invest in the tools to do it right. Time, one might argue, is our most valuable resource. If you can invest cash–and/or a little upfront thought/labor–into saving lots of effort in the long-run, this can be more than worthwhile.
You can also end up with a better quality product. Just as a poorly mounted camera produces shaky video, a bad set of screwdrivers can produce mangled screw heads, a bad soldering iron can lead to poor connections, and… any number of other examples you’d like to add in. Besides, work is more enjoyable when you have the right tools for the job.
Camera equipment costs are relative
To a non-camera person, this all may appear rather expensive–the Joby BallHead 3K is around $50, and the friction arms are… actually pretty reasonable at around $15. However, if you are a serious camera person, the gear I’ve described here might seem rather pedestrian. Wherever you fall on that spectrum, I’ve described works for me after years of amateur and paid videography.
To hammer this point a bit more, Here’s a tripod on Amazon that costs close to $700. Here is another that costs under $30. They both look similar, and nominally perform the same job. To the right person, spending the money is well worth it, but if you’re just starting out, it might not make as much of a difference. Not that I have any idea about those particular tripods, but one would hope that paying 20+ times as much for one option versus the other nets you a tripod that is at least a little bit better.
It’s the same thing with screwdrivers and other tools. If you’re just starting out the difference between a really nice set and something you purchased at Dollar Tree might not be evident. That being said, just bite the bullet and order a set of Wiha drivers. You can thank me later and/or print my magnetic screwdriver holder if you need a place to put them!
Thanks for reading! I hope you will follow along as I post weekly about engineering, technology, making, and projects. Fair warning: I am a native Florida man, and may get a little off-topic in the footnotes.
Note that any Amazon links are affiliate
Addendum/Footnotes:
While my presentation style has evolved and gotten better, so has the competition. Honestly, I really haven’t kept up, and the market seems saturated. I’ve been working on a few videos for YouTube, but have decided to concentrate on this newsletter/blog/Substack as my primary creative outlet for the time being. I can do this at a comparatively high level when compared to the really excellent* content on YouTube. Weird how things come full circle.

*Some of it is excellent, but much of it is not. The required minimum production and thumbnail/exaggeration value is higher than I wish to maintain on a regular basis.