
Fountain Pump Repair 2: Revenge of the Lever Nuts! [QUC #6]
Fountain repair #1 took many hours and much frustration. Repair #2 was easy. Sometimes there is a better way! [Questionable Use Case #6]

I have a fountain next to my front porch on a pad of bricks, installed by the previous owners. It uses a small pump in the base to shoot water out of an opening in the top, which flows down as a pleasant water feature.1
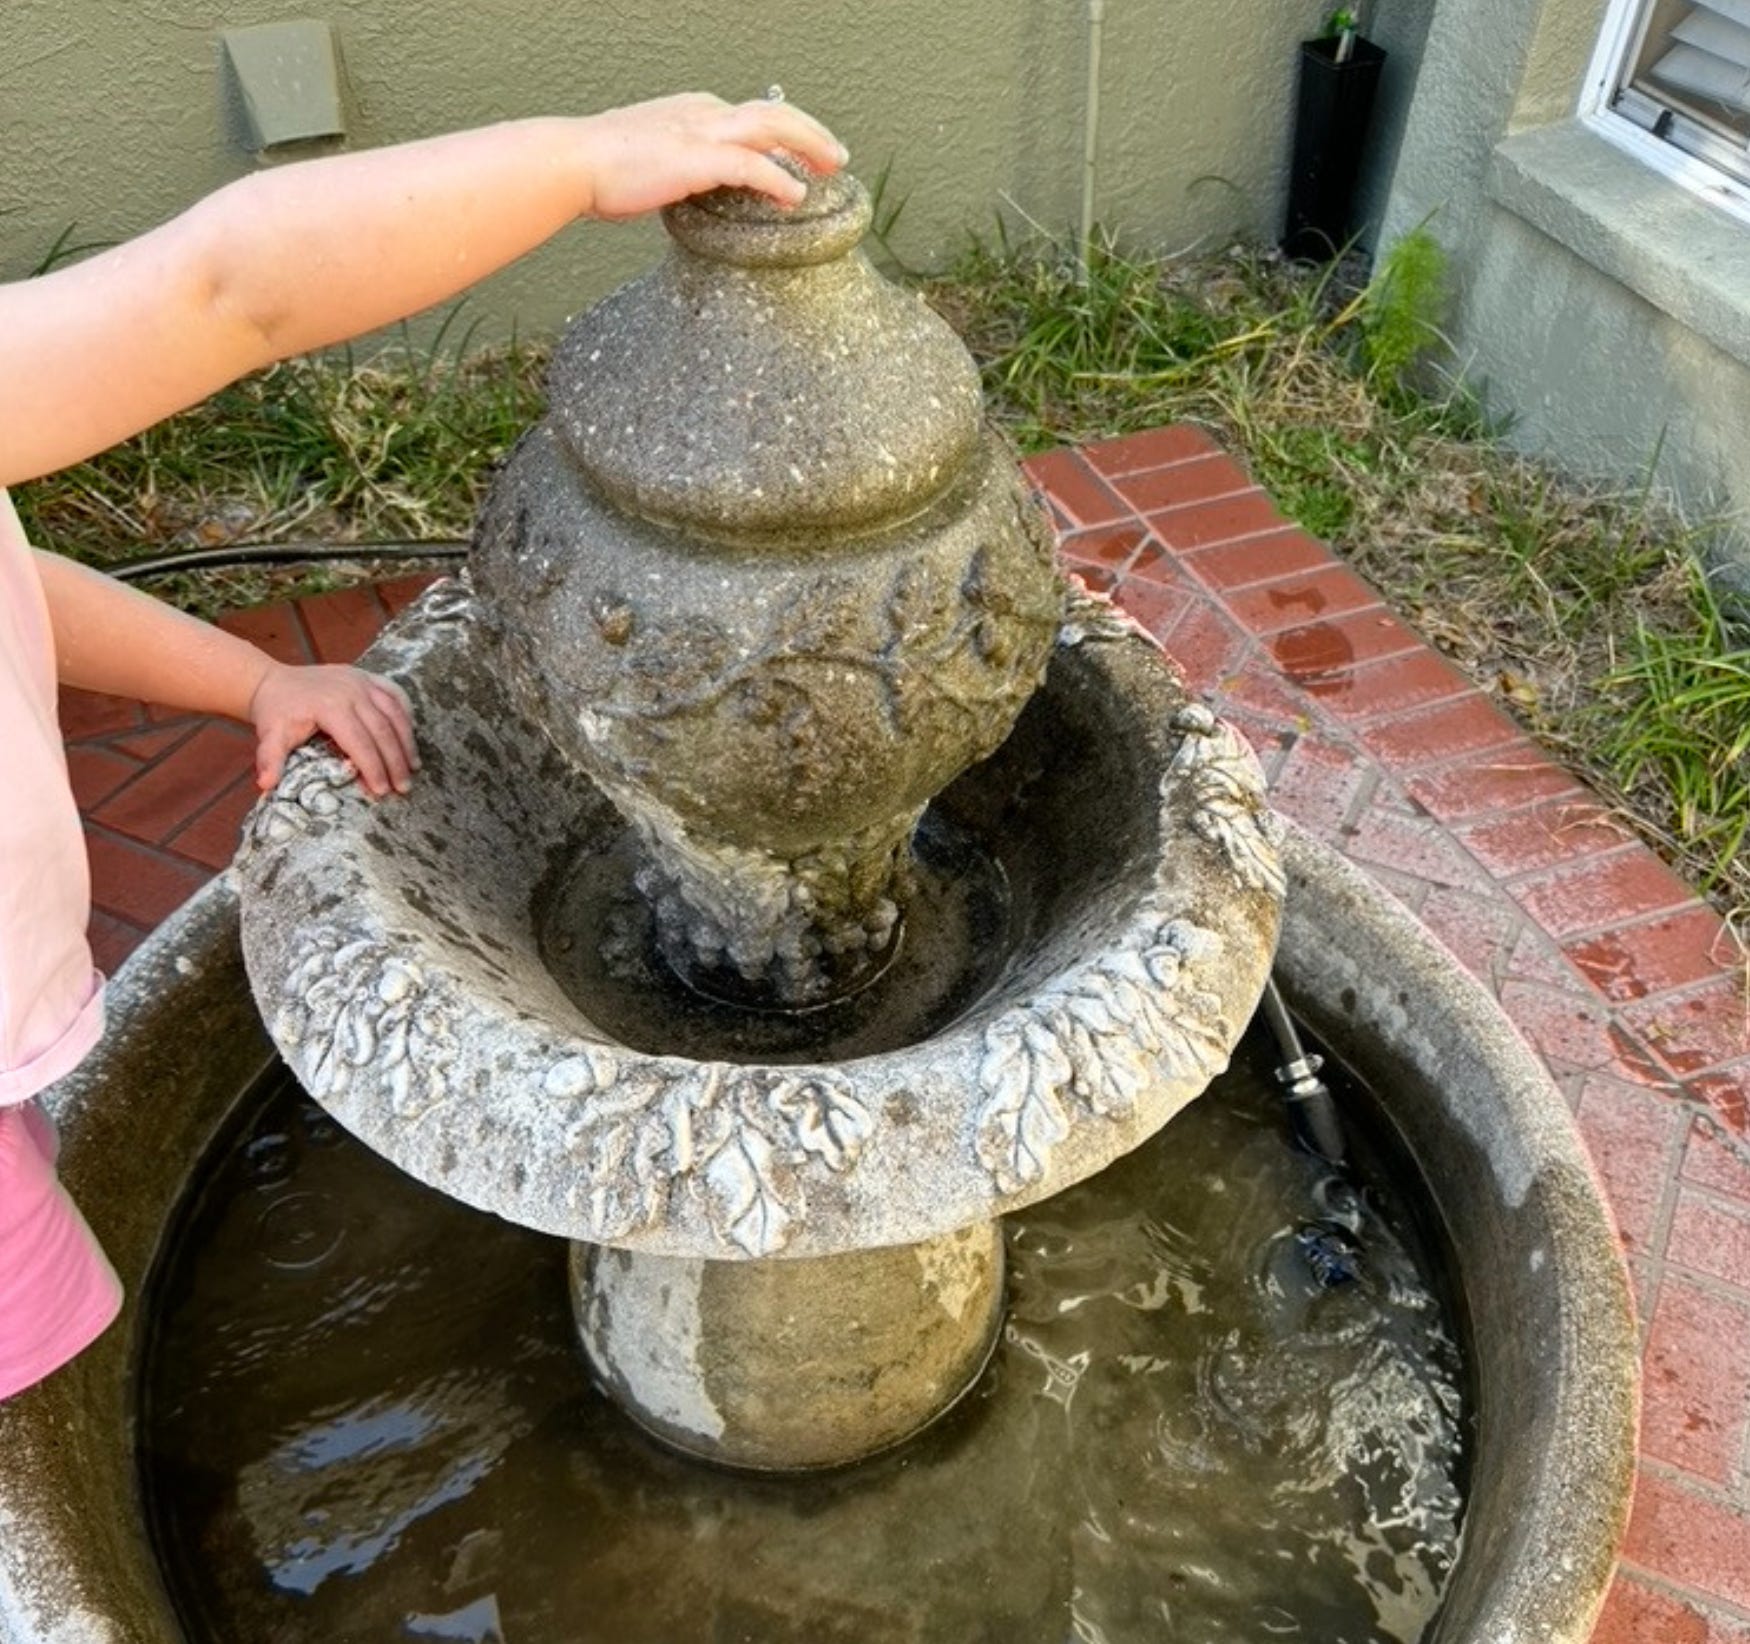
This pump plugs into a nearby outlet for power, but how the cord reaches the small pump was initially a mystery. No problem… until it stopped working. The first repair (2021) was much harder than it had to be, taking many hours of sweat, toil, and frustration, while the second (2025) was relatively easy.
I’ll first outline how I easily fixed the fountain when it broke the second time, then go back and recount my first attempt as a horrendous prequel.2
Finally, the addendum goes over improved techniques via Wago lever nuts provided by Automation Direct. Strap in.3
Fountain repair 2025: Great Success!

After my fountain stopped pumping water (again) in 20244, I promptly procrastinated fixing it for about a year. And then one day I ordered this little pump from Amazon, which comes with a 6.5 foot cable. Just barely long enough to go through a length of pipe under the brick pad and emerge in the dirt next to it.
I cut the plug off of the new pump’s cable so it would fit through the sub-brick pipe (illustrated 👆), then pulled it through the pipe and out the side.5
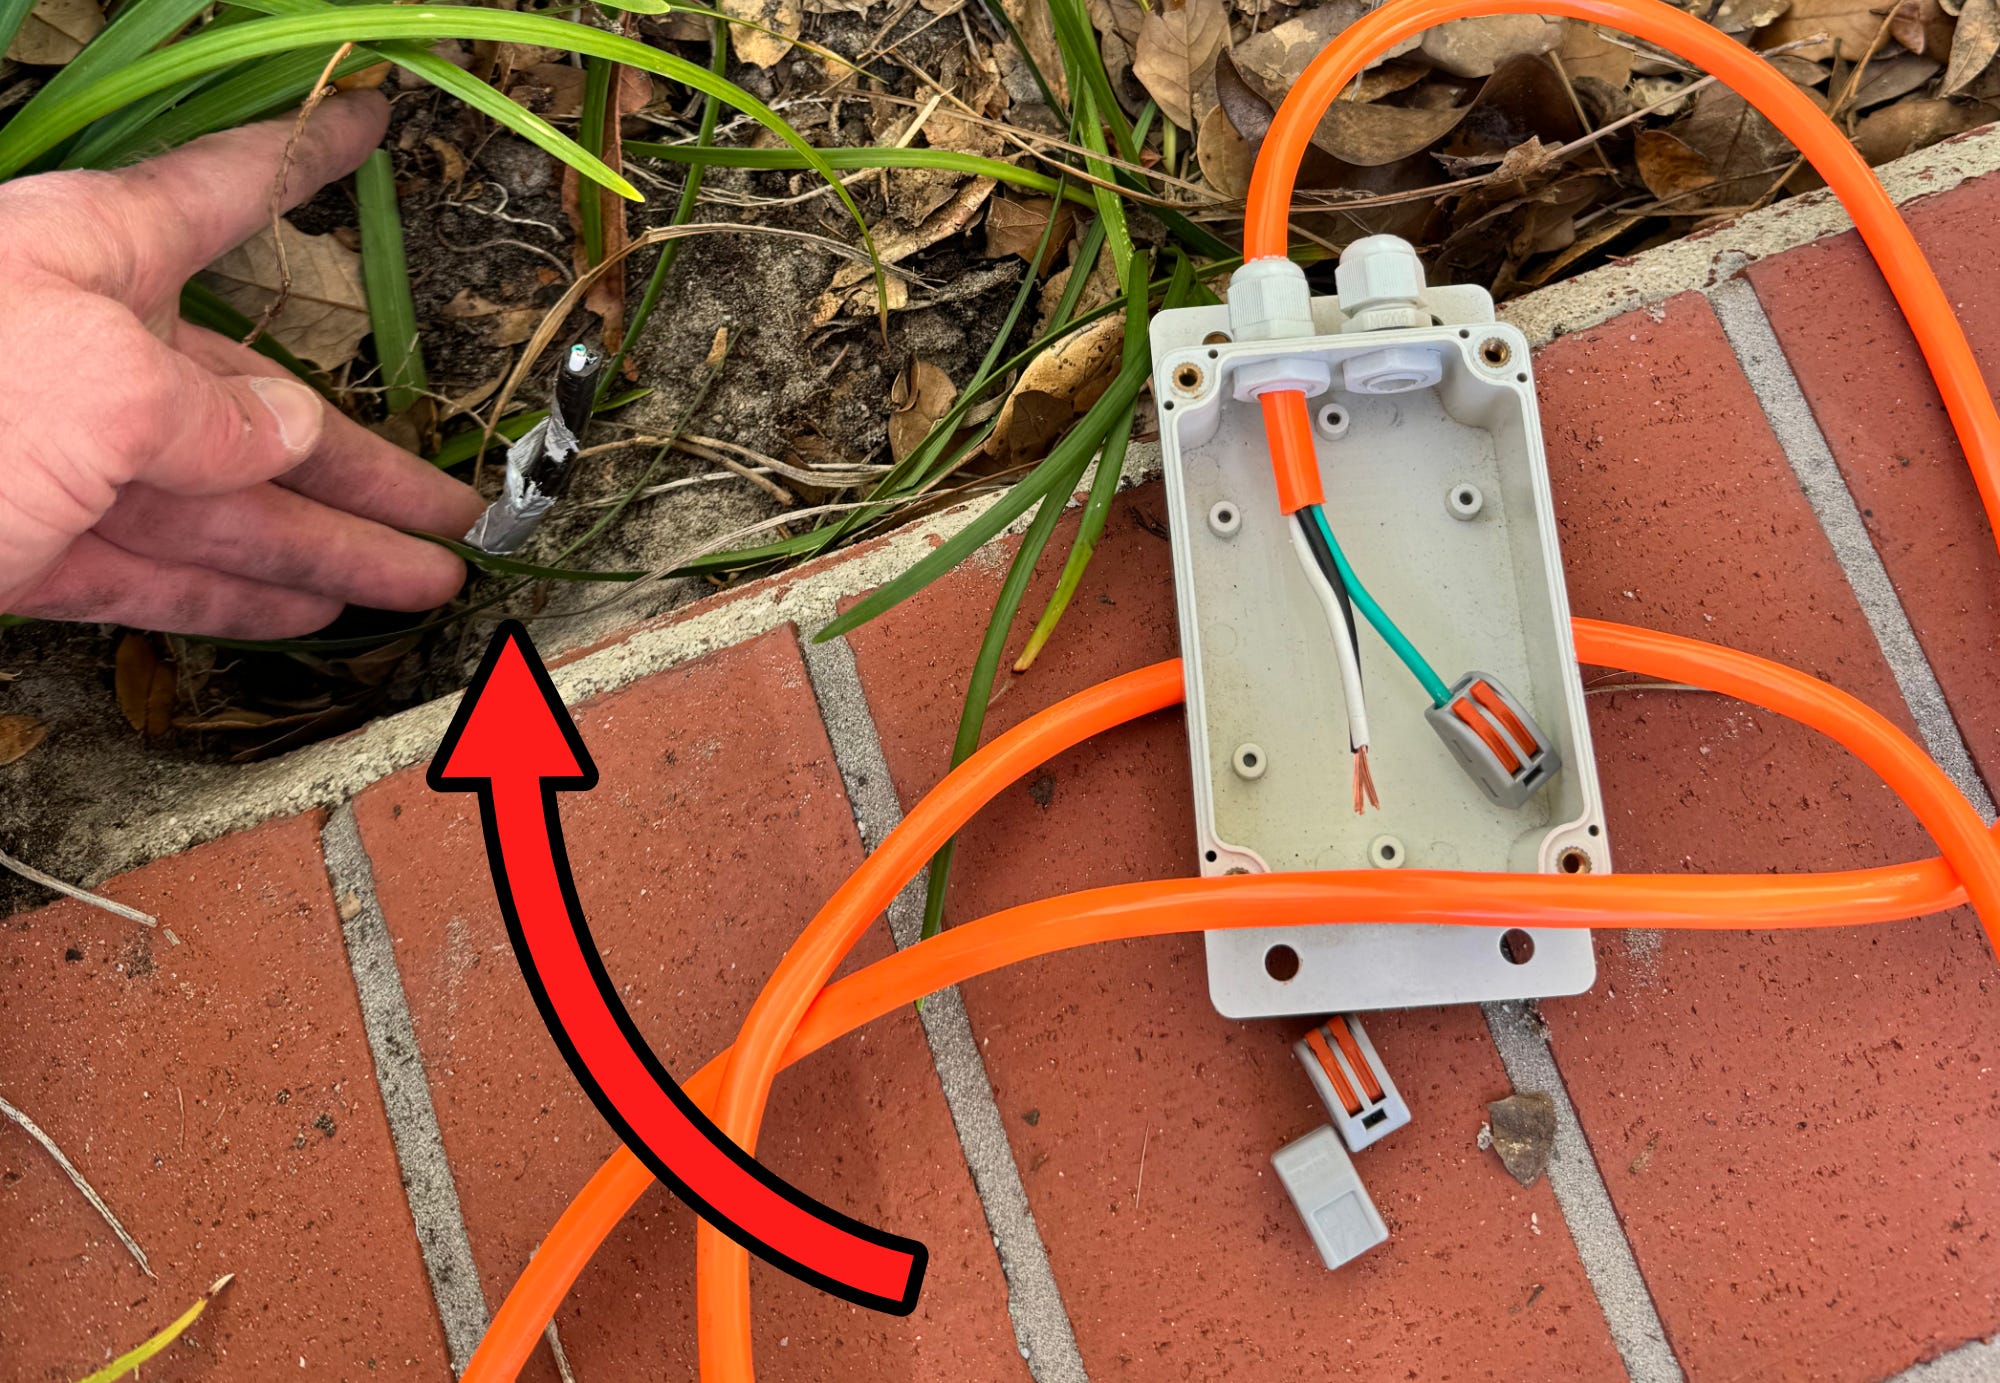
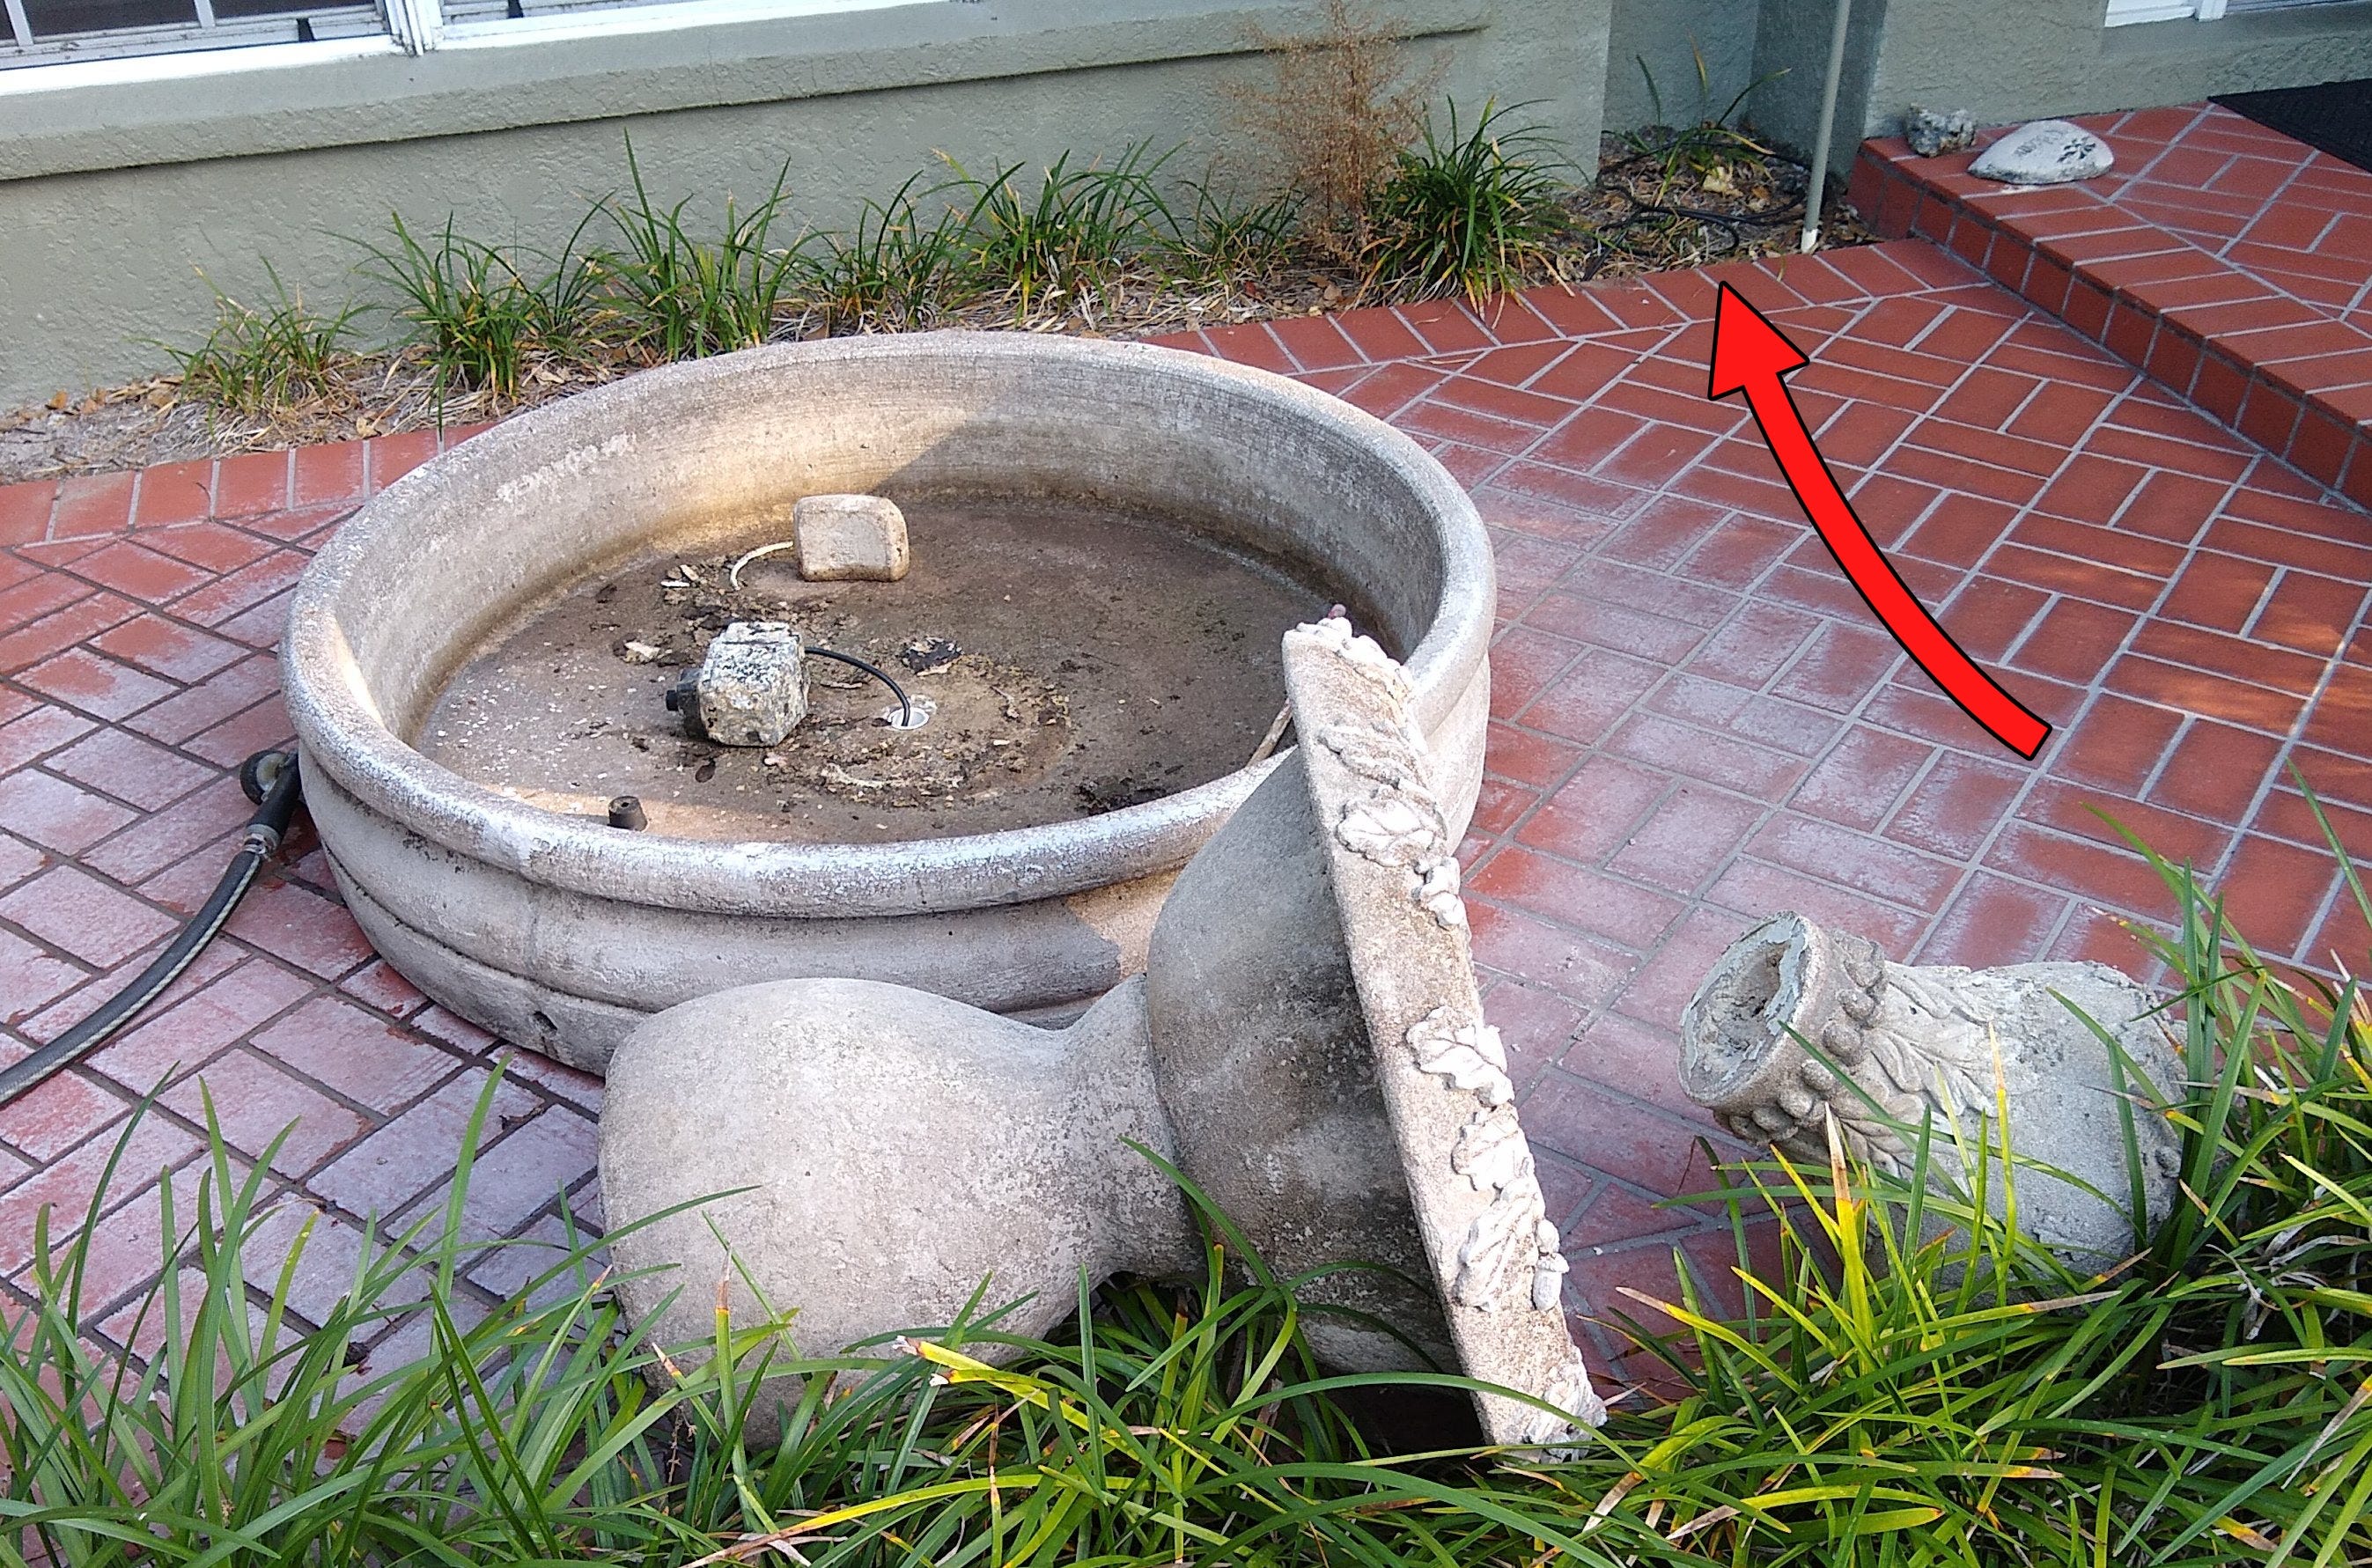
I then fed this cable and one side of a cut extension cord6 into a small electrical box, connected them with lever nuts, and screwed everything shut. I plugged the hole7, added water, and connected the pump tubing. It worked without a hitch.
I even added a smart plug8 so that I could control it via my phone. The replacement took about an hour, and the results were much cleaner than before (though not perfect). I also added something called “oxidizing shock and swim” to the water for algae prevention. This substance sounds rather threatening, but it’s supposed to be safe.
Fountain repair 2021: an exercise in frustration
Rewind to 2021, and my fountain was not working. And I really wasn’t looking forward to fixing it. Without much consideration, it was obvious to me that I’d need to physically dig under the bricks in order to run a new cable.
What followed was me getting very dirty and sweaty while attempting a rather sketchy horizontal drilling operation (inspired by this). Like the library of Alexandria, or the Epstein files, most of the documentation from this operation seems to have been lost to time. However, at some point I realized that whoever originally installed the bricks added a length of pipe underneath, through which wires could be pulled.
At that point the job became much easier, even if it was still challenging. With the original cable gone, I used a fish stick to manipulate the new cable (sans plug) through and out of the pipe. I then soldered a new plug and length of cable on then applied heat shrink in an attempt to avert water intrusion.9 Which worked for a few years.
Coming full circle, lessons learned
In my 2025 repair/inspection, I found that there was significant corrosion in the soldered/heat-shrinked connections. This corrosion appears to have disconnected the circuit. So shoddy work by 2021 Jeremy meant more work for future Jeremy in 2025. I don’t think the actual pump was even bad!
I think I did a better job this time. Though perhaps 2029 Jeremy will think differently… and month-or-so later Jeremy also had some thoughts. So Lesson #1 is: as you build and repair things, be considerate of your future self.
Lesson #2 (and this is the big one) do a little more observation and research before attempting to do something that seems way harder than it should be. It would have saved me a lot of effort way back in 2021!
Lesson #3: realize the limits of heat shrink. Here an electrical box would have been much better. Or was it? 👇
Fountain repair 2025 addendum: hole-y better techniques?

After sharing my success on BSKY10, user RubenKelevra noted that I should really be using ferrules with lever nuts, and that–per DIN standards–the ground wires should be longer than the others. While Florida isn’t under the jurisdiction of Germany’s DIN, i.e. Deutsches Institut für Normung, both techniques do make sense, and the safer the better.
However, Per Wago’s website/video, you can use their see-through lever nut connectors without ferrules. After obtaining some of these 2-pole Wagos from Automation Direct, along with these straight-through Wago connectors that I didn’t end up using here I–first unplugged and–opened up the box again.
To my surprise, I found it was partially filled with water. I’m glad I went back and checked it! I suspect water was gradually leaking in through the seals, so I drilled two small drainage holes to let the water escape. This initially seemed a bit hacky, but per random Internet strangers, apparently it is a good idea/possibly required.

With that solved11, I finally replaced the opaque lever nuts with the clear Wago type, and shortened the other wires a bit so that the ground would be the last to disconnect if the cable was somehow pulled out. I also bought this style ferrule crimper because it looks awesome, but have yet to use it.
What’s the lesson here? Use the new kind of lever nuts, they’re awesome. Perhaps it goes without saying, but don’t use wire nuts. They worked fine for many years, but using wire nuts compared to clear lever nuts is like driving a steam engine-powered car when you have a Tesla charging in your garage.
Other lesson: If you’re going to put your handiwork online, be ready for feedback. How you choose to handle it is up to you!
Finally, I’m documenting what I did, not necessarily the perfect technique. Use any of this information at your own risk and only if you are qualified.
Thanks for reading! I hope you will follow along as I post weekly about engineering, technology, making, and projects. Fair warning: I sometimes get a little off-topic in the footnotes. And I’m from Florida, and so may have had an alligator or two as pets growing up… Perhaps they are alive today and could be used to test earth-wormhole pet friendliness.
Any Amazon links are affiliate
Big thanks to Automation Direct for supplying the clear Wago connectors featured in this article!
Addendum/Footnotes:
If you’re looking for the original “non-revenge” article, there actually isn’t one. Consider this a new literary format, the pre-sequel. Coincidentally(?), several of my products on JC Devices feature a “2” moniker.
Like Godfather Part II… if you watched that one first.
Strap in? I thought it sounded cool, though I’m not sure this article is exciting enough to actually justify such sentiment. Keep your expectations low and you’ll rarely be disappointed is a good rule to live by.
Or was it 2023?
Process detail: I kept the old cable in place so that I could access it from either end of the pipe, then duct-taped the new cable to this old cable and pulled it through with the old cable. Kind of a mouthful, and a bit detaily, thus relegated to the literary basement that is the footnotes.
I.e. the female connector was cut off, revealing the line, neutral, and ground lines inside. Never do this with the other side plugged in, and don’t plug it in until properly connected. The arrangement is colloquially (and morbidly) called a “suicide cable” because if you plug it in you then have bare wires on the other side that are live. I would suggest discarding such a cable if it’s not used immediately, or at the very least keep it in a secure location.
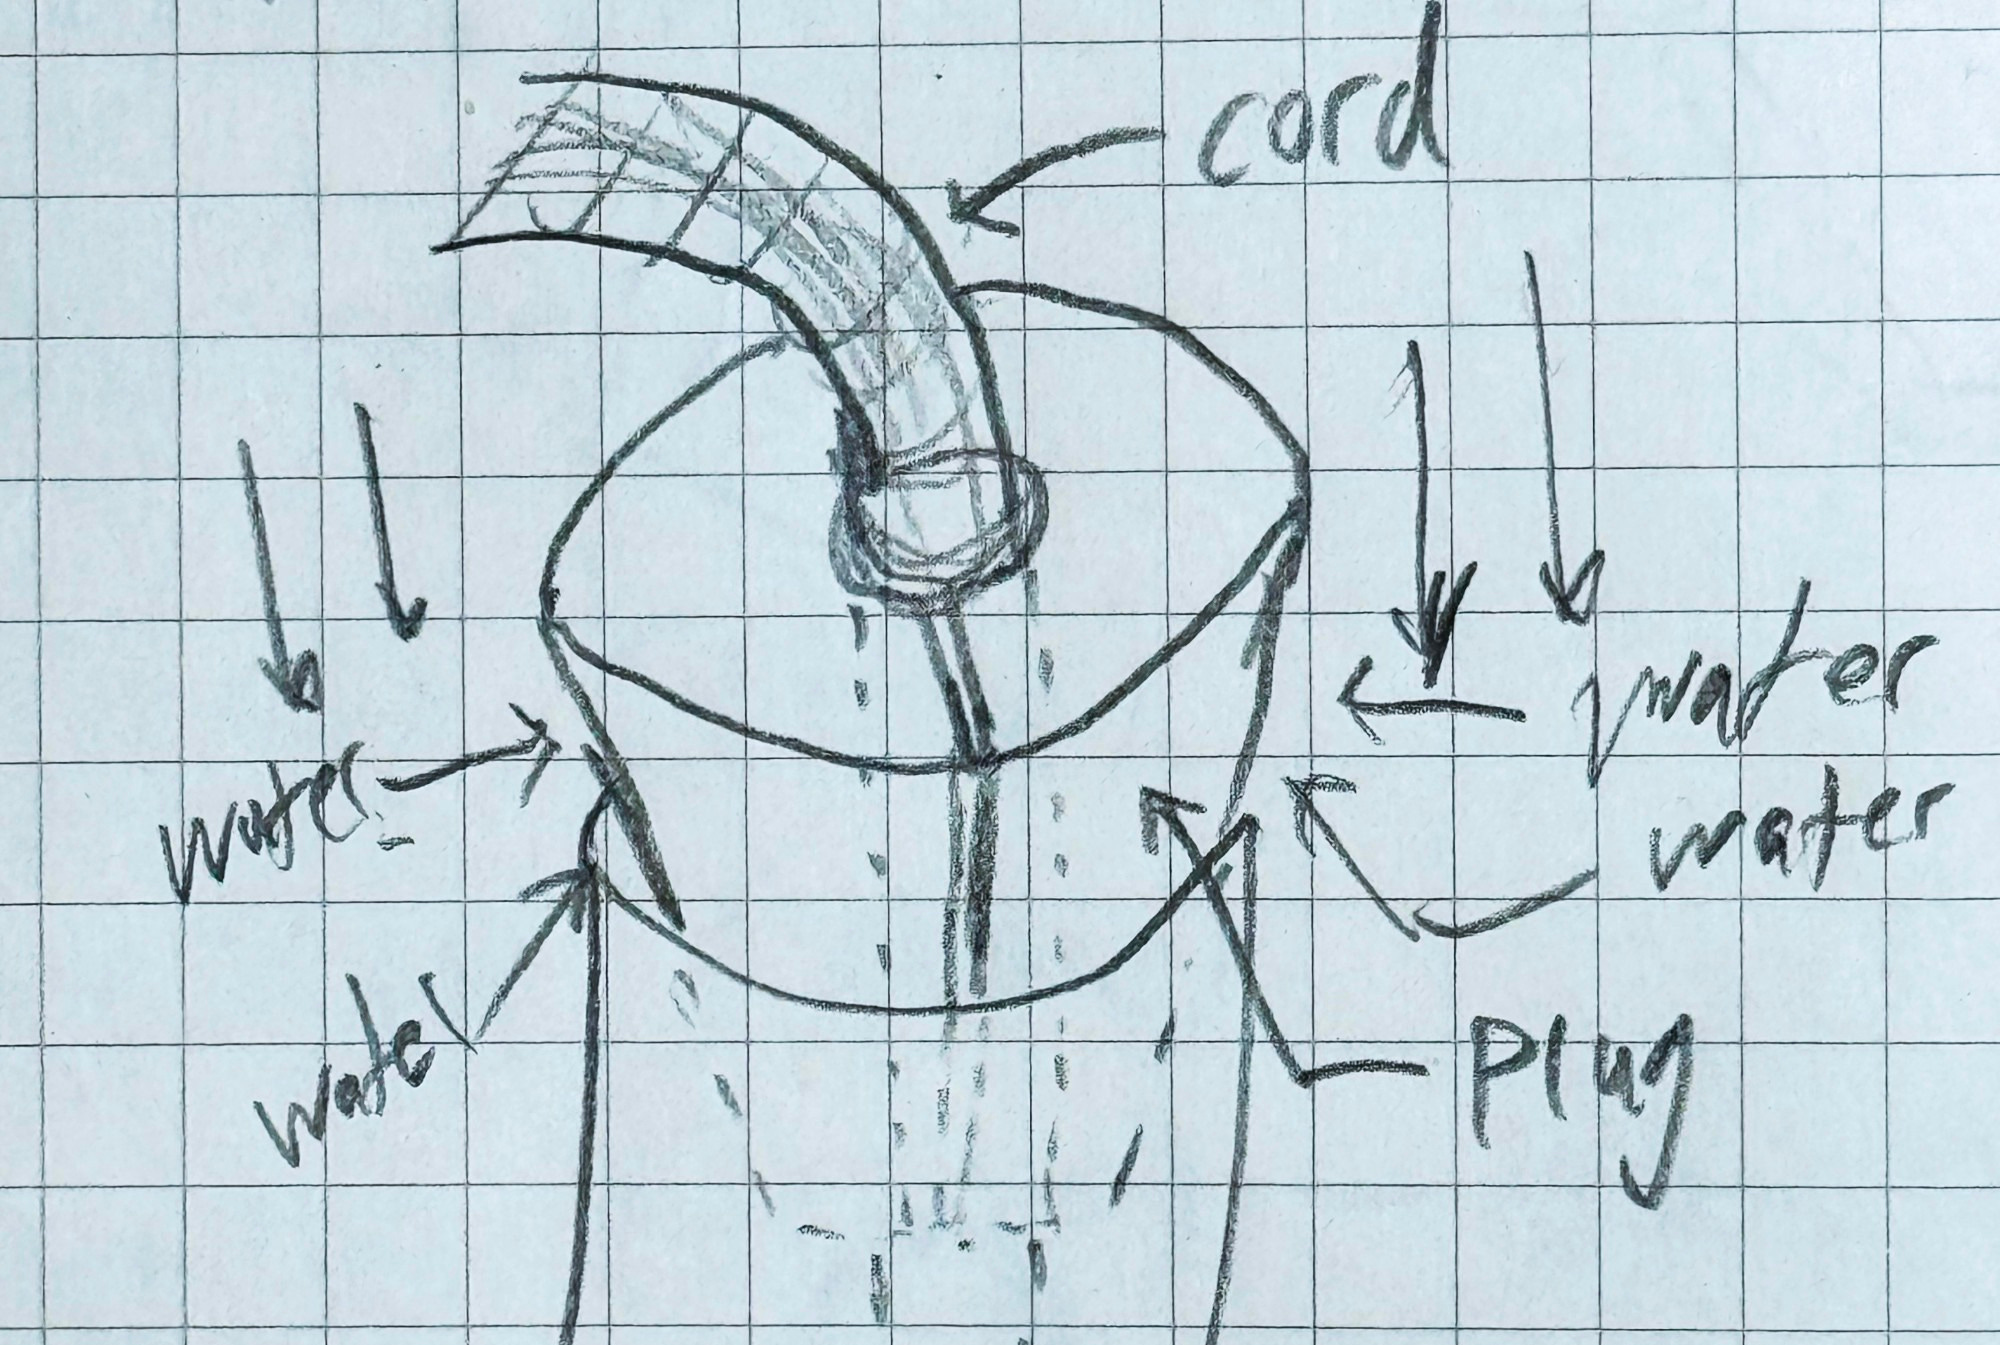
The cord goes through a hollow angled rubber piece that grips tightly in the diameter of the outer hole and around the cord itself. This forms a seal and keeps water from leaking out. Or at least it should. Adding caulk here might not be a bad idea either.
The Wyze Outdoor Plug, which features two independent outlets, and can be reprogrammed with Tasmota firmware for non-cloud operation as outlined here.
Changing things out later, it appears that I actually soldered the cable in two places. I should have minimized this as much as possible.
My account on BSKY. Twitter/X has unfortunately become less useful/fun than in previous years.
Or maybe I changed the lever nuts first, not sure.
A fascinating read. As someone who would happily believe fountains run on magic, it's amazing to see the actual process, including the clever use of lever nuts. Thanks for sharing your project.
Always love a Library of Alexandria reference.